
FBA shipment planner
The FBA shipment planner is where you choose which products to send to Amazon from one of your own or third-party warehouses, and how many units of each. It then hands your selection to the pallet visualiser, which works out the cartons, layers and pallets for each product.
The planner doesn’t create a shipment in Seller Central or change your stock. Create the inbound shipment in Seller Central as usual.
Open the FBA shipment planner
Section titled “Open the FBA shipment planner”The planner has no sidebar entry. Open it from either of these pages:
- Warehouse stock (in the sidebar, under Inventory): on the Inventory view, select Plan FBA shipment. The planner opens with the warehouse you were looking at.
- Overview (in the sidebar, under Inventory): in the table view, select Plan FBA shipment.
Back to inventory returns to the page you came from.
Choose the products and quantities
Section titled “Choose the products and quantities”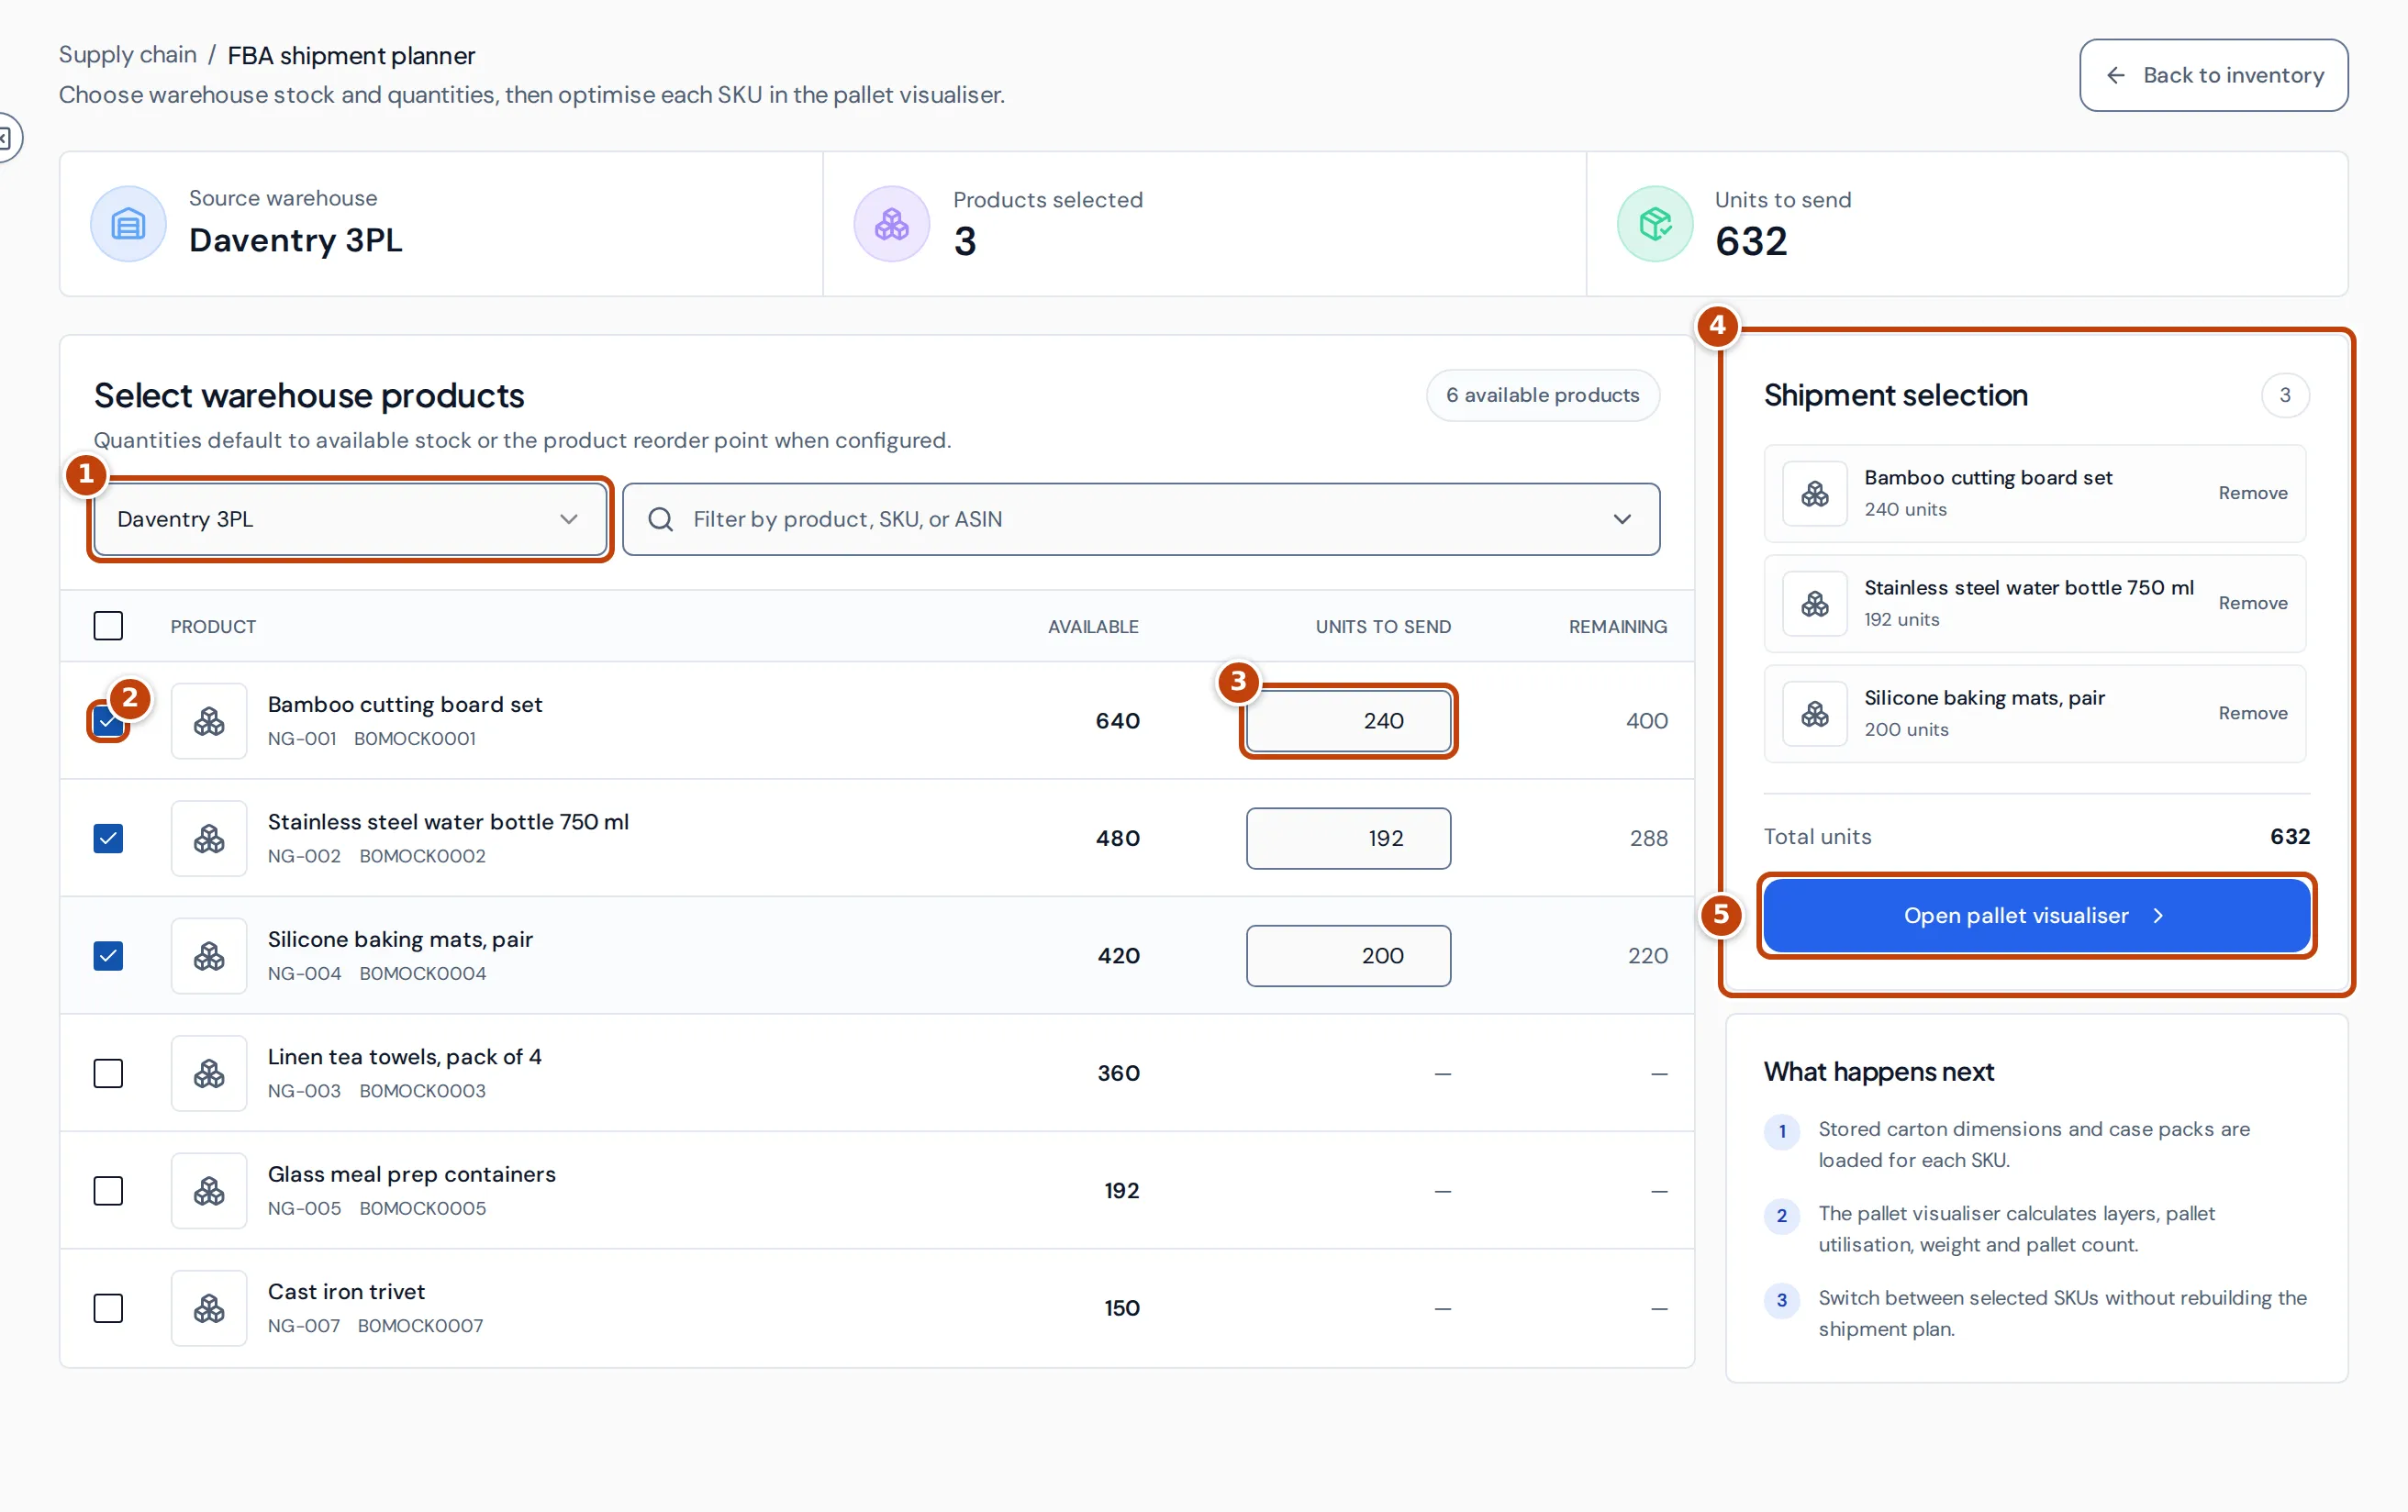
The strip at the top shows the Source warehouse, how many Products selected and the Units to send in total.
- Choose the warehouse to ship from marker 1. The planner starts with the warehouse marked as your default source for Amazon, or the first one with stock. Changing the warehouse clears your selection.
- Optional: narrow the list with Filter by product, SKU, or ASIN.
- Tick each product to send marker 2. The quantity starts at all the available stock, or at the warehouse’s reorder point when one is set and is lower.
- Change Units to send marker 3 if you want a different quantity. It must be between 1 and the Available stock. Remaining shows what stays in the warehouse.
- Check the marker 4 Shipment selection panel, which lists each product with its units and the Total units. Select Remove to take a product out.
- Select marker 5 Open pallet visualiser. The Pallet visualiser opens with your selection.
Open pallet visualiser stays greyed out until at least one product is ticked and every quantity is valid. The tick box in the table heading selects every product shown.
The products listed are the ones with stock available in the chosen warehouse. Only active warehouses are listed.
What happens next
Section titled “What happens next”In the pallet visualiser, Crateworth loads the carton size and units per carton saved for each product, works out the layers, pallet usage, weight and number of pallets, and lets you switch between the products without starting again. See Pallet visualiser.
Your selection is kept in this browser tab only. If you go back to the planner with Back to shipment in the pallet visualiser, your products and quantities are still selected. If you close the tab, they’re lost.
Why the list is empty or Open pallet visualiser is greyed out
Section titled “Why the list is empty or Open pallet visualiser is greyed out”- No warehouse configured: you have no active warehouse. Select Manage warehouses to add one, then receive stock into it.
- No available products found: the chosen warehouse has no stock available, or the product filter hides everything. Choose another warehouse or clear the filter.
- A quantity is out of range: under the selection, the planner says every quantity must be between 1 and the available warehouse stock. A units box is empty, zero or more than the stock. Correct it to continue.
Stock in the planner is the warehouse’s available quantity in Crateworth. If it looks wrong, check the warehouse’s stock on the Warehouse stock page.